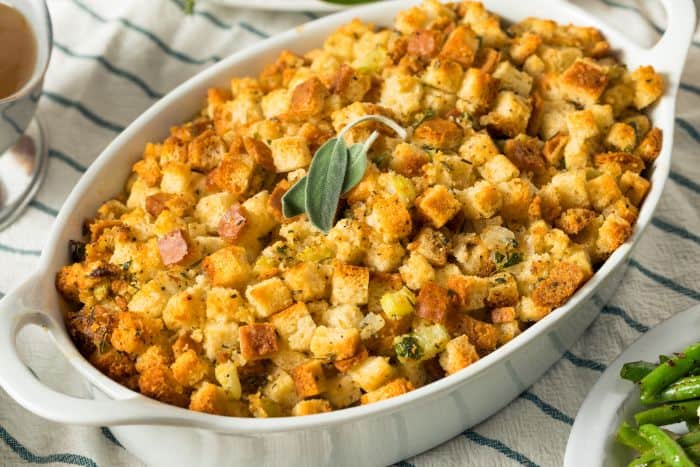
Are you ready to make this Thanksgiving a stress-free feast? We’ve got you covered with a game-changing tip: freeze your stuffing! Yes, you read that right. By prepping your stuffing in advance and freezing it, you can save precious time and reduce last-minute cooking chaos.
In this blog post, we will walk you through the simple steps of how to freeze stuffing before Thanksgiving, ensuring that you have a delicious side dish ready to go when the big day arrives. So, let’s dive in and discover this handy trick that will make your holiday cooking a breeze!

For more Turkey Day tips, read our post on what to serve on Thanksgiving besides turkey.
Why Freeze Stuffing Before Thanksgiving?
When it comes to preparing for the big Thanksgiving feast, one question you may ask yourself is, “What can I make ahead?” Well, my friends, the answer lies in make-ahead stuffing! Let’s take a look at why you should make ahead and freeze your stuffing and how it helps to maintain its quality and freshness.
Benefits of Freezing Stuffing
Freezing stuffing comes with several fantastic benefits. Let’s take a closer look at why you should consider taking this make-ahead approach:
- Convenience: Freezing stuffing allows you to prepare it well in advance, cutting down on the chaos and stress of the Thanksgiving day kitchen. With the stuffing already prepared and frozen, you can focus on other essential tasks, like roasting your Thanksgiving turkey.
- Time-Saver: By making your stuffing ahead of time and freezing it, you can allocate your time more efficiently on Thanksgiving day. Simply pop the frozen stuffing in the oven, and while it bakes, you can focus on other last-minute preparations.
- Enhanced Flavor: Just like a good stew that tastes even better the next day, freezing stuffing actually enhances the flavors. As the ingredients mingle and meld together while frozen, the flavors intensify, resulting in a more delicious and well-developed stuffing.
- Versatility: Freezing stuffing gives you the flexibility to experiment with different flavors and ingredients. Whether you prefer a traditional sage and onion stuffing or want to try something unique like cranberry and sausage stuffing, you can create various batches and freeze them for different taste preferences.
Ensuring Quality and Freshness
Now that we’ve covered the benefits, let’s talk about how freezing stuffing helps to ensure its quality and freshness. Here are a few essential tips:
- Proper Packaging: When freezing stuffing, it’s crucial to package it correctly to prevent freezer burn and maintain its taste and texture. Use airtight containers or heavy-duty freezer bags to keep the stuffing protected from any stray odors in the freezer.
- Labeling: Don’t forget to label your frozen stuffing with the date. This way, you can easily keep track of its shelf life and ensure you use the oldest batches first. It’s recommended to consume frozen stuffing within three months for the best taste and quality.
- Thawing: To thaw your frozen stuffing, transfer it from the freezer to the refrigerator the night before Thanksgiving. This gradual thawing process allows the stuffing to defrost evenly and helps retain its moisture. If you’re short on time, you can thaw it in the microwave on a defrost setting, but be sure to monitor it closely to avoid overheating.
- Reheating: Once your stuffing is thawed, it’s time to bring it back to its warm and comforting state. Preheat your oven, transfer the stuffing to a baking dish, and bake it until it’s heated through, golden on top, and has a lovely crispy crust.
By following these guidelines and freezing your stuffing before Thanksgiving, you can have a scrumptious side dish ready to impress your guests with minimal effort on the day of the feast.
Step-by-Step Guide to Freezing Stuffing
In this section, we will walk you through the step-by-step process of freezing your stuffing. Let’s get started!
Preparing the Stuffing
Before you can freeze your stuffing, you need to make sure it’s properly prepared. Follow these simple steps:
- Cook the stuffing: Start by preparing your favorite stuffing recipe. Whether it’s classic bread-based stuffing or a creative variation, make sure it’s fully cooked before freezing.
- Allow it to cool: Once cooked, let the stuffing cool down to room temperature. This step is crucial as freezing hot or warm food can lead to bacterial growth.
Portioning the Stuffing
Portioning your stuffing makes it easier to thaw and reheat later on. Here’s what you need to do:
- Divide into portions: Take your cooled stuffing and divide it into individual portions using a spoon or an ice cream scoop. Consider the serving size you usually prefer or the number of guests you expect.
- Shape and size: If you want uniform portions, shape the stuffing into balls or patties. This will make it easier to fit in storage containers and thaw evenly.
Cooling and Packaging
Proper cooling and packaging are vital to maintaining the quality and freshness of your stuffing. Follow these steps:
- Cool thoroughly: Place the portions of stuffing in a single layer on a baking sheet or tray. Make sure they are not touching each other. Allow them to cool in the refrigerator for about 1-2 hours. This step prevents condensation and keeps the stuffing from becoming soggy during freezing.
- Packaging options: Choose the packaging that suits your needs and freezer space. You can use resealable freezer bags, airtight containers, or wrap each portion tightly in aluminum foil. Ensure that the packaging is freezer-safe to prevent freezer burn.
- Remove air: When using freezer bags, remove as much air as possible before sealing. This helps prevent freezer burn and extends the shelf life of your stuffing.
Labeling and Storing
Proper labeling ensures that you can easily identify and use your frozen stuffing when the time comes. Here’s what you should do:
- Label the package: Write the date of preparation and a clear description of the contents on each package. This information will help you keep track of how long the stuffing has been frozen and avoid confusion.
- Store in the freezer: Place the labeled stuffing packages in the freezer. Make sure to arrange them in a way that maximizes space and allows for easy retrieval.
That’s it! You have successfully prepared and frozen your stuffing for Thanksgiving. Now you can focus on other aspects of your holiday meal preparation. When you’re ready to use the frozen stuffing, simply thaw it in the refrigerator overnight and reheat it in the oven or microwave. Enjoy the convenience and great taste of your make-ahead stuffing!
For more Thanksgiving recipe ideas and tips, check out Delish’s Thanksgiving Recipes or Food Network’s Thanksgiving Guide. They offer plenty of inspiration to help you create a memorable Thanksgiving feast!

Thawing and Reheating Frozen Stuffing
Thawing Methods
When it’s time to enjoy your delicious frozen stuffing, proper thawing is essential to ensure it retains its flavor and texture. Here are a few tried-and-true methods for thawing your frozen stuffing:
- Refrigerator Thawing: This is the safest method for thawing stuffing. Simply place the frozen package in the refrigerator and allow it to thaw slowly over 24 hours. Make sure to place the package on a plate or in a bowl to catch any condensation that may accumulate.
- Cold Water Thawing: If you’re short on time, you can use the cold water thawing method. Place the frozen stuffing in a leak-proof plastic bag and submerge it in cold water. Change the water every 30 minutes to maintain a safe temperature. The stuffing should thaw within a few hours.
- Microwave Thawing: If you’re really in a time crunch, you can use the microwave to thaw your frozen stuffing. Check the packaging for specific instructions on power and timing. Be sure to transfer the stuffing to a microwave-safe dish before heating.
Reheating Options
Once your stuffing is thawed, it’s time to bring it back to its piping-hot, flavorful glory! Here are a few options for reheating your frozen stuffing:
- Oven Reheating: For a classic, oven-baked result, preheat your oven to 350°F (175°C). Transfer the desired amount of stuffing to an oven-safe dish, cover it with foil to prevent drying out, and heat it for about 20-30 minutes. To achieve a crispy topping, remove the foil for the last 10 minutes of baking.
- Stovetop Reheating: If you prefer a faster method, you can reheat your stuffing on the stovetop. Simply heat a skillet or saucepan over medium-low heat, add a bit of butter or oil, and gently sauté the stuffing for 5-10 minutes until it’s heated through. Stir occasionally to ensure even heating.
- Microwave Reheating: When you need a quick individual serving, the microwave comes to the rescue again. Place a portion of the thawed stuffing in a microwave-safe dish, cover it with a microwave-safe lid or microwave-safe plastic wrap, and microwave on high for 1-2 minutes. Stir and continue microwaving in 30-second intervals until it reaches the desired temperature.
Remember, regardless of the reheating method you choose, always check the internal temperature of the stuffing with a food thermometer to ensure it reaches at least 165°F (74°C) for food safety.
Pro tip: To add an extra burst of flavor, you can drizzle a little bit of warm broth or melted butter over the reheated stuffing just before serving. It will help to keep it moist and enhance the taste.
Tips for Freezing Stuffing
Avoiding Certain Ingredients
When preparing stuffing for freezing, it’s essential to avoid certain ingredients that may not hold up well in the freezer. Ingredients like delicate fresh herbs, crispy bacon, or crunchy nuts tend to lose their texture and flavor when frozen. Instead, focus on using ingredients that will maintain their quality after thawing. Consider using dried herbs or spices, sautéed onions, celery, or mushrooms, which freeze well without compromising taste or texture.
Proper Storage Containers
To ensure your frozen stuffing stays fresh and doesn’t get freezer burn, it’s important to use the right storage containers. Opt for airtight containers or resealable freezer bags that are specifically designed for freezer use. These containers will help prevent moisture loss and freezer odors from affecting the quality of your stuffing. Additionally, label each container with the date of freezing to keep track of its freshness.
Safe Storage Duration
While freezing can extend the shelf life of many foods, it’s important to note that stuffing has a limited safe storage duration in the freezer. It is recommended to consume frozen stuffing within 1 to 2 months for the best quality and flavor. To avoid any potential health risks, make sure to adhere to these guidelines and never consume stuffing that has been frozen for an extended period.
By considering these tips when freezing your stuffing, you can ensure that it retains its delicious taste and texture when it’s time to serve it on Thanksgiving Day. Remember to plan ahead, choose the right recipe, use suitable storage containers, and adhere to safe storage durations. With these strategies in place, you can confidently prepare your stuffing ahead of time and enjoy a stress-free Thanksgiving feast!
Creative Uses for Frozen Stuffing
Stuffing-Stuffed Mushrooms
Mushrooms, when stuffed with savory stuffing, become little bite-sized flavor bombs. It’s a fantastic appetizer or side dish that will impress your guests.
To make stuffing-stuffed mushrooms, start by cleaning the mushrooms and removing the stems. Spoon a generous amount of frozen stuffing into each mushroom cap, pressing it down gently. Place the stuffed mushrooms on a baking sheet lined with parchment paper.
Next, preheat your oven to 375°F (190°C) and bake the mushrooms for about 15-20 minutes or until the mushrooms are tender and the stuffing is golden brown. The result is a delightful combination of earthy mushrooms and flavorful stuffing.
For a touch of elegance, you can garnish the mushrooms with chopped fresh herbs like parsley or thyme before serving. These stuffed mushrooms are perfect for holiday gatherings or any occasion when you want to serve a crowd-pleasing appetizer.
Pro tip: For more variety, consider sprinkling some grated Parmesan cheese on top of the stuffing before baking. It adds an extra layer of richness and a lovely cheesy flavor.
Stuffing-Stuffed Chicken Breasts
If you’re looking to elevate your chicken dinner, try stuffing chicken breasts with frozen stuffing. This adds a burst of flavor and keeps the chicken moist and juicy.
To prepare stuffing-stuffed chicken breasts, start by making a incision along the side of each chicken breast, creating a pocket. Stuff the pockets with thawed frozen stuffing, being careful not to overstuff.
Next, season the chicken breasts with salt, pepper, and any other desired herbs and spices. Heat some olive oil in a skillet over medium heat and sear the stuffed chicken breasts until they are golden brown on both sides.
Transfer the seared chicken breasts to a baking dish and finish cooking them in the oven at 375°F (190°C) for about 20-25 minutes or until the chicken is cooked through and the stuffing is heated.
Pro tip: For an extra burst of flavor, you can wrap each stuffed chicken breast with bacon slices before searing. The bacon adds a delicious smoky taste that pairs perfectly with the stuffing.
Stuffing-Stuffed Peppers
Stuffed peppers take on a whole new level of deliciousness when filled with frozen stuffing. It’s a hearty and satisfying dish that makes a great main course.
To make stuffing-stuffed peppers, start by cutting off the top of each bell pepper and removing the seeds and membranes. Blanch the peppers in boiling water for a few minutes to soften them slightly.
While the peppers are blanching, thaw your frozen stuffing. Once the stuffing is thawed, spoon it into each blanched pepper until they are filled to the top.
Place the stuffed peppers in a baking dish and add a little bit of water or tomato sauce to the bottom of the dish to prevent the peppers from drying out. Cover the dish with foil and bake at 375°F (190°C) for about 30-40 minutes or until the peppers are tender.
When the stuffed peppers are done, remove them from the oven and let them cool slightly before serving. The combination of the sweet bell peppers and the savory stuffing is a match made in culinary heaven.
Pro tip: For a touch of cheesiness, sprinkle some shredded cheddar or mozzarella on top of the stuffing before baking. The melted cheese adds a gooey and indulgent element to the dish.
For more information on stuffing recipes and Thanksgiving cooking, check out this helpful resource.
Making your stuffing ahead of time not only saves you precious minutes when making your Thanksgiving dinner but also allows the flavors to develop and meld together, resulting in an even more delicious dish. So go ahead and give this make-ahead stuffing method a try. Your taste buds and your schedule will thank you!